


 If you know now that late winter will make you yearn for harbingers of longer, warmer days then autumn is the time to plant early flowers like tulips, hyacinths, muscari, alliums, daffodils and lilies. Crack the whip, and get them in the ground because they need winter’s cold days before those welcome little green leaf tips break through the chilly soil. If your mature beds are crowded, now is the time to dig up clumped bulbs AND other perennials, break them apart, and spread next year’s glory elsewhere on your plot of earth.
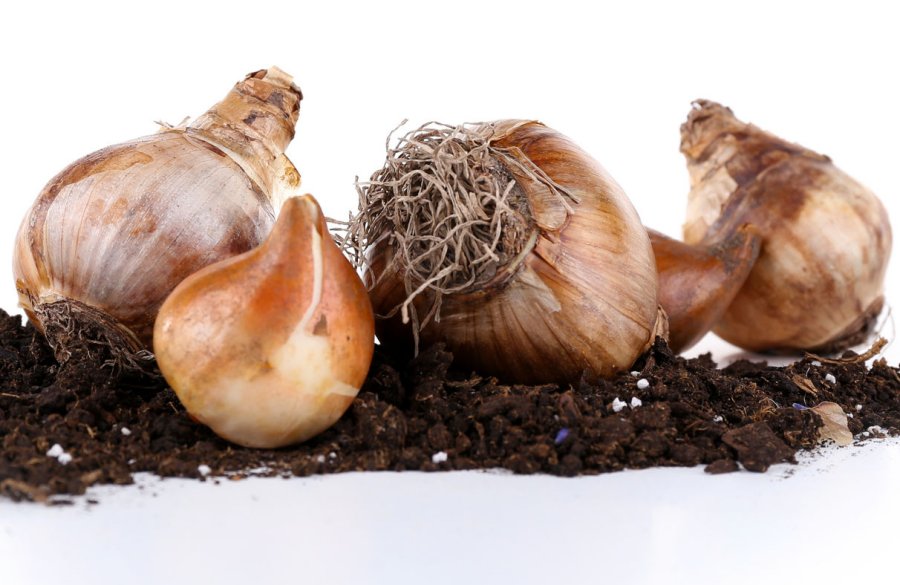
A “true” bulb is an underground plant structure that contains what horticulturalists call adventitious (or adventuresome) roots, a basal plate which is the actual stem, a developing central flower bud that arises from the stem tip, and overlapping leaves sometimes called scales. The subterranean leaves feed the dormant plant. There may be small lateral bulbs called bulblets growing around the outside of the basal plate. Tulips, lilies, daffodils, and onions are all true bulb plants. Cut one open lengthwise during the winter and you can see all the tiny flower parts snoozing inside.
Decent drainage to a depth of 8-12 inches is essential to a successful bulb bed, though come to think of it most plants appreciate wiggling their tootsies above the water table. Among other possible problems, wet compacted soil retards plant growth. Till in plenty of compost especially if you want the plants to grow in clay soil. Don’t be stingy because compost holds water and air, and feeds the ‘crobes that predigest complex chemicals into smaller items plants can take in.
When the amended soil is ready, dig the planting hole to the correct depth. Check with a local nurseryman about depth as labels, catalogs, and reference books may not be right for your area. The rule of thumb is 2.5 to 3 times the diameter of the bulb in question. If you are planting in clay you may want your bulbs closer to the surface. Experiment a little if you’re feeling adventitious!
Add a handful of 13-13-13 fertilizer to the bottom of the hole then cover it with a layer of soil. The bulb and fertilizer should not have direct contact. Set the bulb in the hole, pointed end UP then completely cover with the amended soil you first removed. Don’t fertilize again until AFTER the plants bloom next spring.
After things turn cold outside put 2-4 inches of organic mulch atop the bed. Don’t do this while days are still warm. Extension agents recommend hay, straw, or pine bark. This prevents the soil from freezing and thawing which is a great way to damage bulbs and their roots. If we have a dry winter, give the bulbs an occasional drink for good measure.
In the spring remove the mulch when frost danger has passed. New shoots need plenty of sunlight from the get-go. Cut faded flowers to prevent seed formation which robs stored food from the bulbs. Let the green stems and leaves photosynthesize food until they turn brown and flop over, then use a sharp knife to remove them from sight. Specialists recommend not leaving spent leaves and stems to decompose as they may harbor pathogens that will hurt the bulbs over time.


